Unity Game Engine: Previous Recap
Hello, previously I talked about how to use the new Unity Input system in the Unity game engine. Not only that, the user has the choice to use either the legacy, new or both of the input systems. For that, I also included the use of both the legacy and new input systems in the game project. During that time, I also had to change the project settings for input. Another was to add a new component to the game object from the inspector. Add and modify the new scripts to make it work with the selected input system. Fix the errors after the scripts compile and check for code misconfiguration. This happens with the new Visual Studio tools that help with AI(artificial intelligence).
Unity Game Engine: Week 6
I also believe that I previously said about using the physics system. Unfortunately, I could not fully cover it to accomplish that. Instead, I made a tutorial on how to use the new input system because I could not finish that before. As of today, this is where I explain the use of the legacy Unity physics system on the game object. This will involve the use of physics colliders, masks, collision, and others. About the physics system, the main point is to make the object interactable. This could be interactions with other kinds of objects in the scene that are considered static objects.
Adding the 2D Physics Component
In Unity, there are several steps one could take to add the current physics component to the game object. This is to set up the game object before pressing the Play button in the Unity game engine. One way is to press Component at the top of the Hierarchy in the Unity game engine. There is a sub-hierarchy for the component; select the physics 2d component, where there are a bunch of physics components. Some of the physics component 2d that are available in the sub hierarchy is rigidbody 2d, box collider 2d, and others. This is all component is really helpful when creating 2d game objects with a physics system.


Adding 2d Physics in the Inspector of the Game Object
Another method to add the component is through the Game Object option in the Inspector. This is similar to the above hierarchy: find and select the physics 2d. That will show the different types of physics 2d component have in the Inspector. The only difference is at this setup, there is a logo for the type of component in 2d physics system. The graphic will help you understand the 2d physics component. When you select the component, it will automatically be added to the game object in the inspector. For this game object, you will need box collider 2d and rigidbody 2d.
What is Box Collider 2d
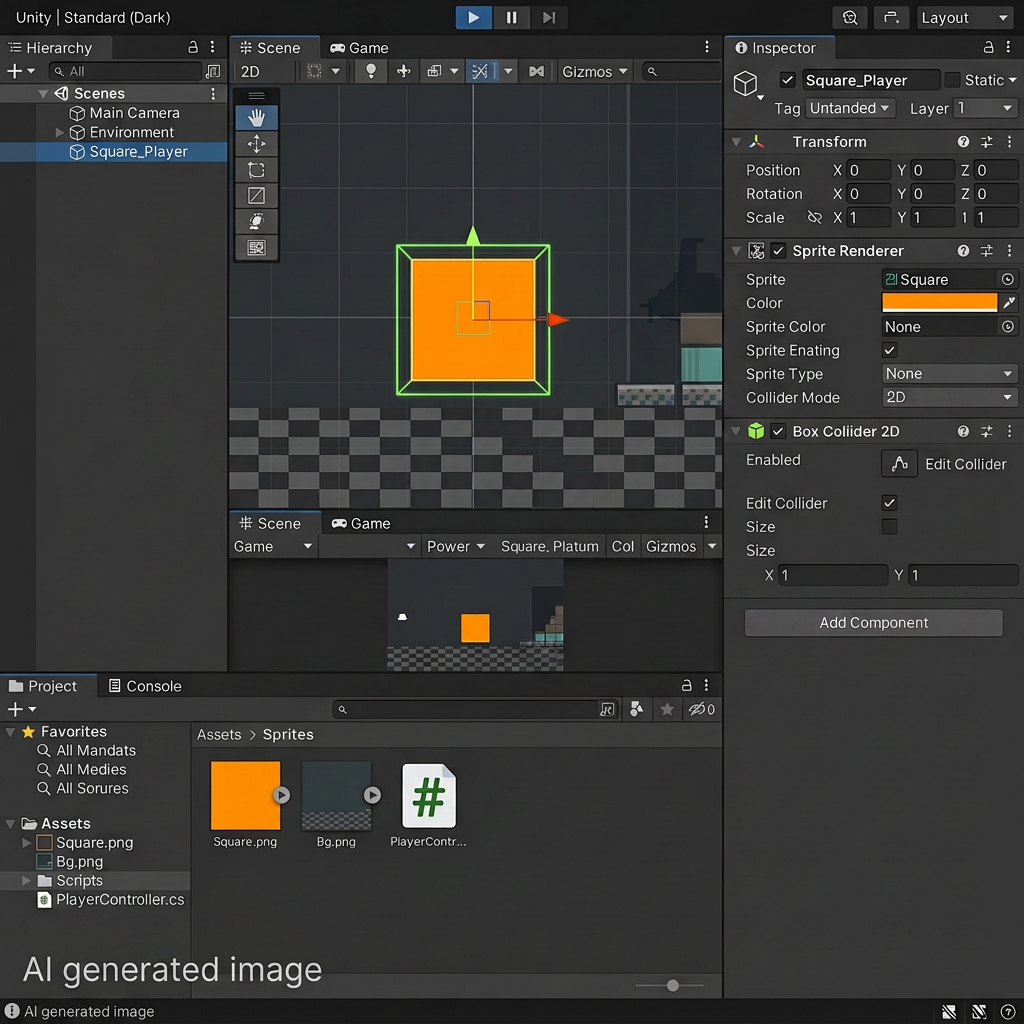
Box collider 2d is a 2d physic component system that is used within the game object in the scene. Most interactable game objects in the scene require this component to work correctly with other game objects. Otherwise, there will be no collision and interaction when a player moves a game object in the game. Developers or users will need to configure the collision for the box colldier 2d. This can be used within the Edit Collider variable in the component of the game object. Where you can actually shape the collider with the game object dimensions, especially the vertices. In the Scene tab, there is a green colour for the game object that shows the physics collider. If you did not see it, you will need to turn on all gizmos at the top of the Scene tab.
Editing Box Collider 2D

Instead of editing in the scene editor, the user can also adjust a variable offset and size. This lets the user edit the collider by directly manipulating the float variables. The default value for the size variable on the x and y axes is one. The default value for the offset, which represents the position of the collider, is zero. The script in the MonoBehaviour system eventually uses the isTrigger variable. The OnTrigger system detects when one object comes into contact with another object and affects only trigger events instead of collisions. Whether to use this variable depends on the game system the user wants to implement.

As with the above picture, the user can also configure other variables like used by effector, auto tiling, composite operation, edge radius, and layer overrides. Developers need the Used By Effector setting when the game object interacts with the other Effector 2D physics system. The auto tiling variable updates the sprite renderer properties according to the information. The user applies the composite operation with the other attached game object or Physics Collider 2D component. For this option, developers can select None, Intersect, Merge, Difference, or Flip. The layer override setting configures the layer of the game object among other layered game objects in the scene. The Info variable gives more information regarding the game physics object, such as attached body, shape count, material, and bounds.
What Is Rigidbody 2D
Rigidbody 2D is where the box collider is needed, especially for the player to interact with other game objects. Without a Rigidbody 2D, the game does not know where the object can be static and collide with the player. Also, you can configure the game object with different kinds of settings, especially related to the game settings. For these interactions, I choose the dynamic settings so the player can experience free gravity. Free gravity means the physics gravity system applies directly to the game object. This setting makes the game object move downward based on the physics settings in the Unity system.
Kinematic Rigidbody 2D

As you can see in the image above, the body type uses the kinematic setting, so gravity does not affect the game object. Developers usually choose kinematic to create smooth movement for the game object when no other forces act on it. Only the input system configures the settings, which causes slight movement of the Rigidbody. When the user does not use kinematic and instead selects dynamic, the user can apply additional settings. You can see this in the image below, where the variable uses auto mass, mass, linear damping, angular damping, and gravity scale. The game applies this variable when the player controls the game object, and gravity affects it.
Dynamic Rigidbody 2D

What about the collision detection? There are two options: discrete and continuous. Discrete gives the game object better performance, so use it as the default option. Continuous updates the physics whenever the game object interacts with something. According to the Unity documentation for the rigidbody 2d, when you use continuous collision detection, the game object consumes more CPU performance. The Sleeping Mode variable controls how the game updates physics during gameplay, with three options: Never Sleep, Start Awake, and Start Asleep.
More Rigidbody 2D Variables
Interpolate is used with the movement of the rigidbody 2d position, especially the transform. There are options for None, Interpolate, and Extrapolate. Interpolate make the movement smooth in the previous frame, while Extrapolate makes the movement smooth in the next frame. How about the constraint variable? That constraint variable allows the user to freeze certain positions on the x- and y-axis of the game object. The user can also freeze the rotation, especially on the z-axis, where the rotation of the game object is. In gameplay, the game object could not move or rotate on certain axes based on the editor or script setup.
Conclusion On Adding The 2d Physics Component

After adding the 2d physics system component to the game object and setup. Next, suppose the game object is ready to be used within the game interaction. For this configuration, I set up the 2d rigidbody to be used dynamically. The setting is default, where you will see the simulated variable automatically tick to true. From the above picture, you can see that the game object is automatically falling down. This happens in the Unity game engine after the user presses the Play button. This is the effect of the gravity system and mass based on the configuration of rigidbody 2d of the game object. Let me know what you think in the comments section about adding 2d physics component to the game object.
I drafted this article from my own perspective and used AI to polish the language.
Concept art (created with generative AI, touched up manually).


Leave a Reply